

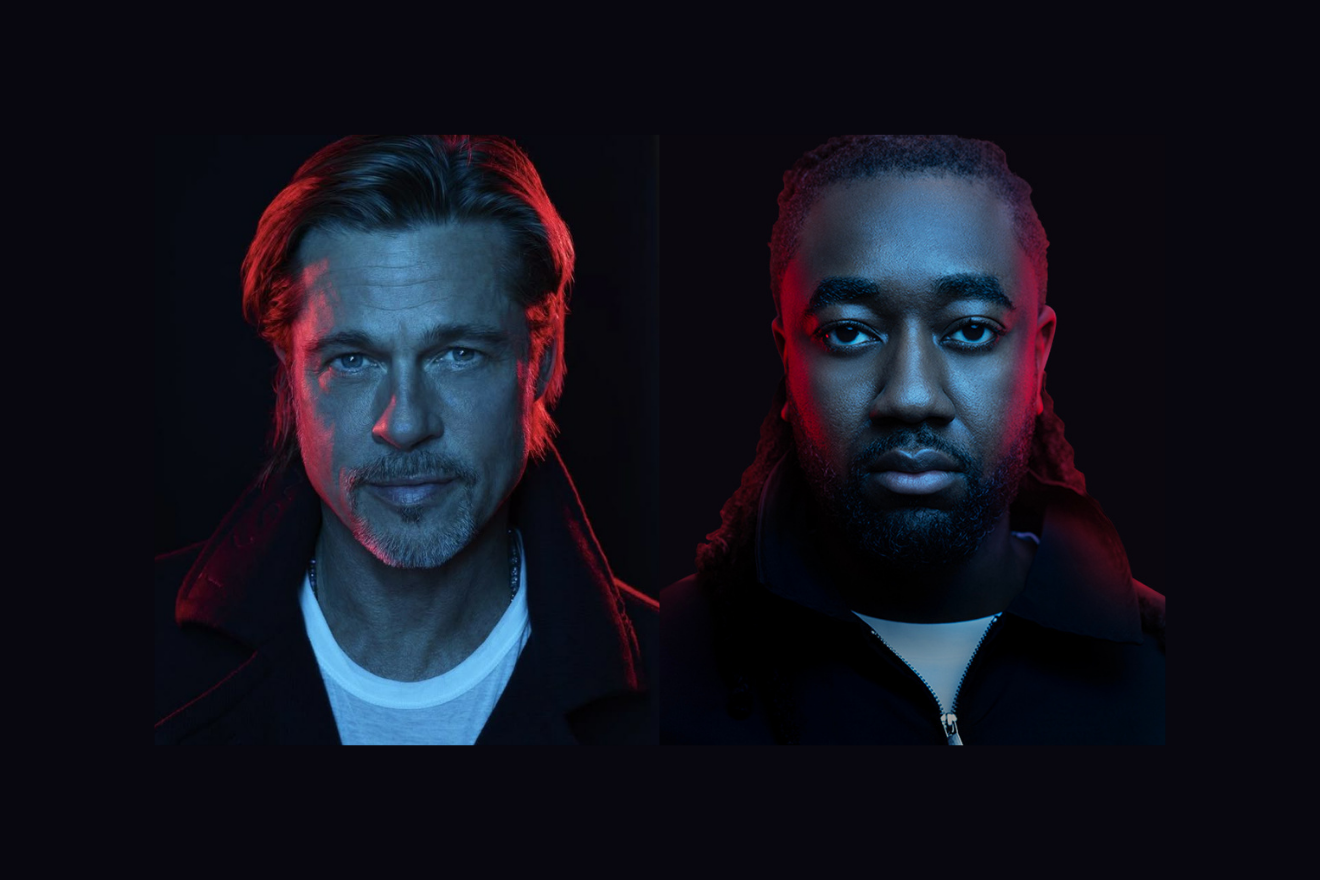
THE BRAD PITT PORTRAIT SET UP
EQUIPMENT USED (WITH LINKS)
Camera & Lens:
Lights:
– Used as the key light with the blue gel
Godox Trigger XPro-C (make sure to select the correct one for your camera)
– This is used to trigger the flash when the shutter is released
– This was used as the red rim lights
Softbox:
– The softbox used for the key light
– Used to mount bowens style modifiers on to the AD200
Gels:
Godox AD200 Gels GODOX BD-07 II
Stands:
Add Your Heading Text Here
Creating compelling portraits requires understanding how light shapes faces and conveys emotion. Portrait lighting techniques form the foundation of professional photography. Whether shooting in a studio or on location, mastering light control transforms ordinary images into striking portraits.
Understanding Portrait Lighting Fundamentals
How to light portraits starts with recognizing facial structure. Light reveals or hides features based on its direction and quality. Side lighting emphasizes texture and dimension. Front lighting minimizes imperfections but can appear flat. Top lighting adds drama but requires careful positioning.
Professional portrait setup begins with one main light source. Place it at 45 degrees to your subject and slightly elevated. This creates natural shadow patterns that define facial features. Adjust height and angle based on individual face shapes. Round faces benefit from side lighting while angular faces work well with softer positions.
Creative portrait lighting goes beyond technical correctness. Experiment with unconventional angles and intensities. Low lighting creates intimate, mysterious moods. Bright, even lighting produces clean, commercial looks. Match your lighting style to the emotion you want to convey.
Building Your Lighting Approach
Studio portrait tips emphasize consistency and control. Start with your key light properly positioned. Add fill light only if needed to soften shadows. Many powerful portraits use just one light source. Additional lights should serve specific purposes, not just fill space.
Lighting for expressive portraits requires reading your subject. Watch how light falls across their face during conversation. Notice which angles flatter their features. Some faces look best with split lighting. Others shine with broad lighting patterns. Adapt your setup to each individual.
Portrait lighting techniques include several classic patterns. Rembrandt lighting creates a small triangle of light on the shadowed cheek. Loop lighting produces a small nose shadow angling toward the corner of the mouth. Butterfly lighting places the key light directly in front and above, creating a shadow under the nose.
Celebrity Portrait Lighting Secrets
Celebrity portrait lighting often employs simple but precise setups. High-end photographers use large light sources placed close to subjects. This creates wrap-around illumination that flatters features. Soft light minimizes skin texture while maintaining dimension.
Professional photographers adjust lighting based on facial features. Deep-set eyes need front lighting to avoid dark shadows. Prominent noses benefit from flat lighting to minimize their appearance. Strong jawlines look great with side lighting that emphasizes structure.
Advanced Techniques
Study light quality as much as direction. Hard light creates defined shadows and dramatic contrast. Soft light produces gentle transitions and even tones. Size and distance of your light source determine quality. Larger sources closer to subjects create softer results.
Control background separately from subject lighting. Dark backgrounds create low-key portraits with emphasis on faces. Light backgrounds produce high-key images with airy feelings. Use flags and gobos to prevent light spill where unwanted.
Modifiers shape light character significantly. Softboxes create rectangular catchlights and even illumination. Umbrellas spread light broadly for group shots. Beauty dishes offer focused softness perfect for fashion work. Grids add directional control to any modifier.
Practical Application
Practice with available subjects before important sessions. Photograph friends and family to test different setups. Document what works and why. Build a mental library of lighting solutions for various face types and moods.
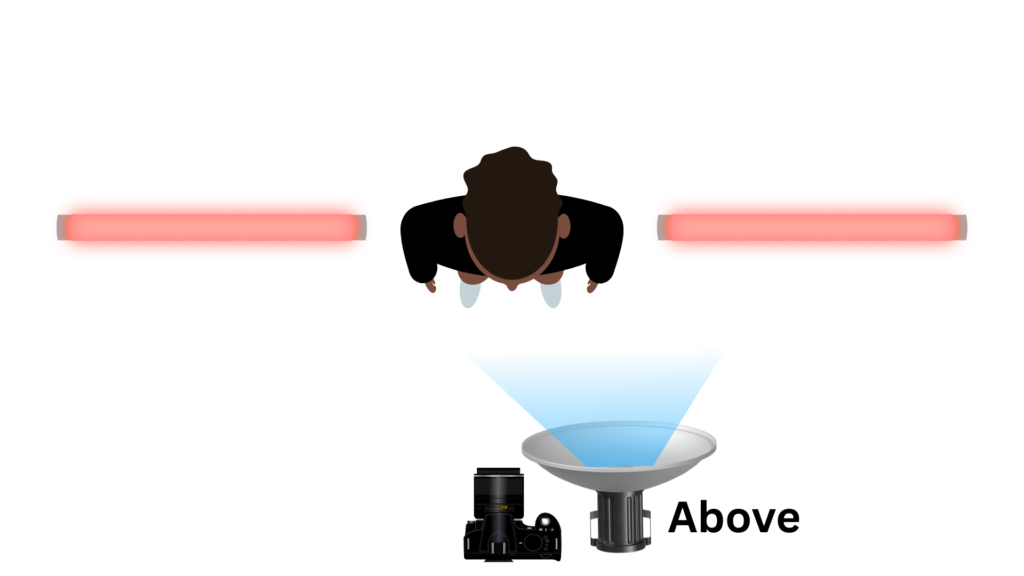
I’d love to see your social media video included in the blog posts. The IRL BTS with the diagram above is super helpful.
Thats a good idea! I will find a way to add the video here.